How to Run Terraria as a Windows Service with FireDaemon Pro.
Terraria is a 2D sandbox game where you can build, explore, fight and build.
Terraria can be run as a Windows service using FireDaemon Pro. This allows you to start and run the dedicated server automatically when Windows boots and before login. FireDaemon Pro also allows you to start multiple instances of the game server, monitoring them and automatically restarting those instances in the event they crash. FireDaemon Fusion can also be used to manage your Terraria service, plus other Windows services via your web browser.

Terraria Dedicated Server Setup Under FireDaemon Pro
Please follow the steps below to set up a Terraria as a Windows service with FireDaemon Pro
Step 1: Download, Install and Configure Terraria Server
- Create a folder on your system, for Terraria Server, C:\Terraria Server
- Download the latest Terraria Server. A single ZIP file terraria-server-xxxx.zip.zip is downloaded.
- Open the zip and navigate to "xxxx\Windows" (where xxxx is the current version number). Extract the contents of that folder into C:\Terraria Server
- You should now have the file "TerrariaServer.exe" in C:\Terraria Server. If you have another folder in that folder, then keep going deeper into the folder path until you can't go further and cut/paste the 5 files into C:\Terraria Server.

- Open C:\Terraria Server\serverconfig.txt, edit to your liking and save it as a new file like myserver.txt. This is so that when there's an update, you don't lose all your settings (you'll need to check the new config if there's any new commands you need to add to your config).
- Ideally your config should look something like the following (change the uncommented values to your liking):
#Load a world and automatically start the server.
world="C:\Terraria Server\Worlds\world1.wld"

#Creates a new world if none is found. World size is specified by: 1(small), 2(medium), and 3(large).
autocreate=1

#Sets the world seed when using autocreate
seed=ChangeMe

#Sets the name of the world when using autocreate
worldname=Terraria

#Sets the difficulty of the world when using autocreate 0(classic), 1(expert), 2(master), 3(journey)
difficulty=0

#Sets the max number of players allowed on a server.  Value must be between 1 and 255
maxplayers=8

#Set the port number
port=7777

#Set the server password
password=ChangeMe

#Set the message of the day
motd=Please don’t cut the purple trees!

#Sets the folder where world files will be stored
worldpath="C:\Terraria Server\Worlds\"

#Sets the number of rolling world backups to keep
worldrollbackstokeep=6

#The location of the banlist. Defaults to "banlist.txt" in the working directory.
banlist="C:\Terraria Server\banlist.txt"

#Adds addition cheat protection.
secure=1

#Sets the server language from its language code.
#English = en-US, German = de-DE, Italian = it-IT, French = fr-FR, Spanish = es-ES, Russian = ru-RU, Chinese = zh-Hans, Portuguese = pt-BR, Polish = pl-PL,
#language=en-US

#Automatically forward ports with uPNP
upnp=1

#Reduces enemy skipping but increases bandwidth usage. The lower the number the less skipping will happen, but more data is sent. 0 is off.
#npcstream=60

#Default system priority 0:Realtime, 1:High, 2:AboveNormal, 3:Normal, 4:BelowNormal, 5:Idle
priority=3
Step 3: Download and Install FireDaemon Pro
- Download FireDaemon Pro installer
- Double-click installer and follow the installation wizard to complete the installation.
- For more information about installing FireDaemon, see the FireDaemon Pro Users Guide.
Step 4: Install Frameworks
You need to download and install 2 frameworks before the server will run:
Step 5: Set Up Terraria as a FireDaemon Pro Service

The most important field on the tab is the Parameters. The Parameters define the initial setup of your server. The full parameter list should be as follows:
-config myconfig.txt
- "-config myconfig.txt” - tells the server to load the configuration you customized.
Next, click on the FireDaemon Pro Settings tab:
Enter appropriate values in the fields on the Settings tab as follows:
- (Optional) Logon Account: Enter the Windows account under which the game is to be run, e.g. the current user account.
- Password / Confirm Password: Enter the logon account's password twice.
- (Optional) Interact with Desktop: If this setting is enabled (default), the game server's output messages can be seen in the console window on Windows Session 0. To switch to Session 0, it may be necessary to install FireDaemon Zero and ZeroInput. Alternatively, this setting may be disabled, in which case the game server's messages will be hidden.
- (Optional) Priority: To allocate more CPU time to the game server, select a higher scheduling priority in this field.
- (Optional) CPU Bindings: To run the game server on a specific CPU, specify the appropriate CPU in this field.
Next, click on the Lifecycle tab. Set Shutdown By to "Forceful Termination" and check "Console Program".
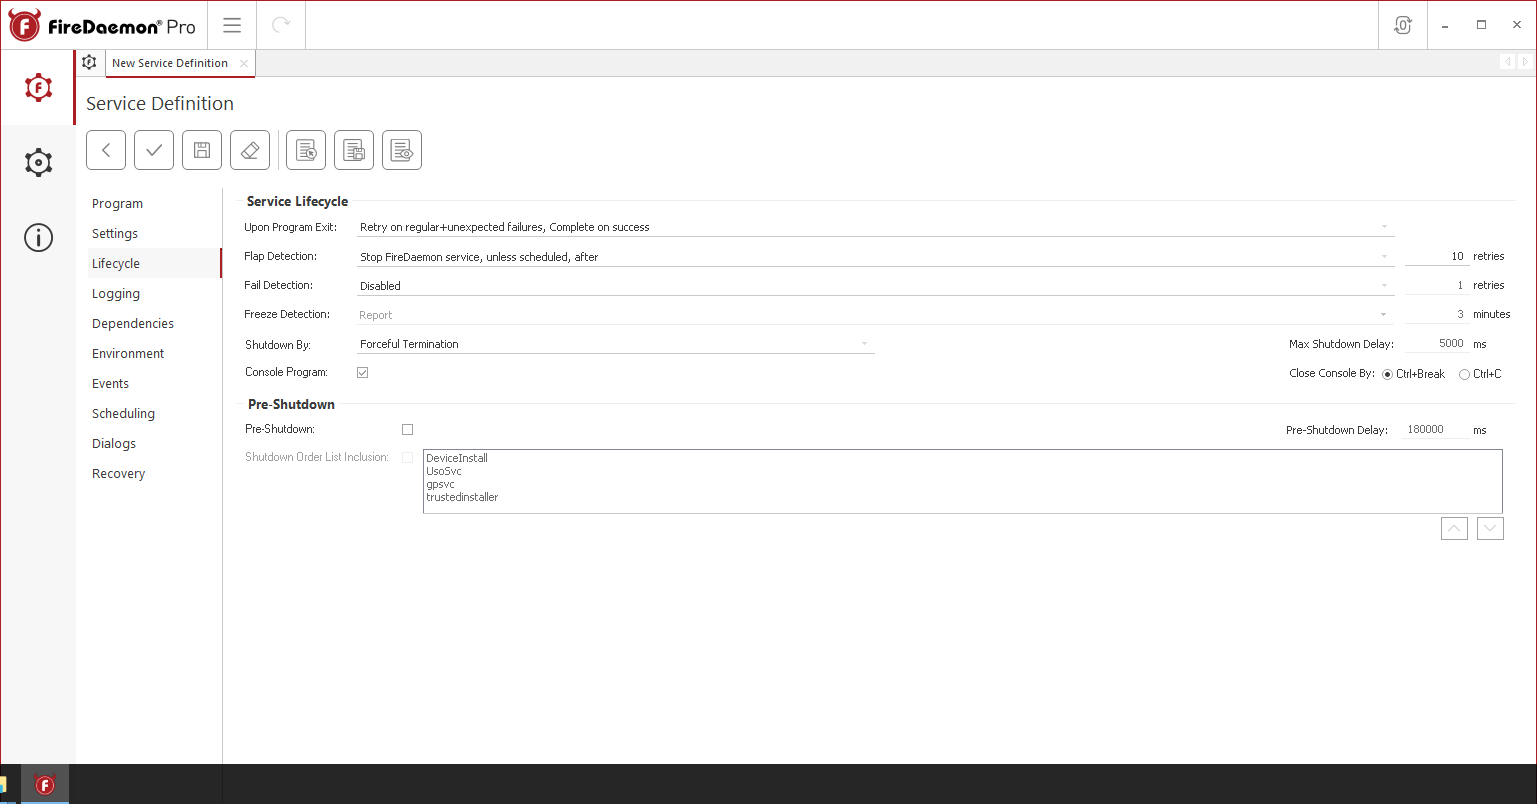
Lastly, click the Save and Close (ie. the tick) button on the toolbar. If the service's Startup Type is set to Automatic or Automatic (Delayed-Start), it will start immediately.
Step 6: Verify that Terraria is Running Correctly
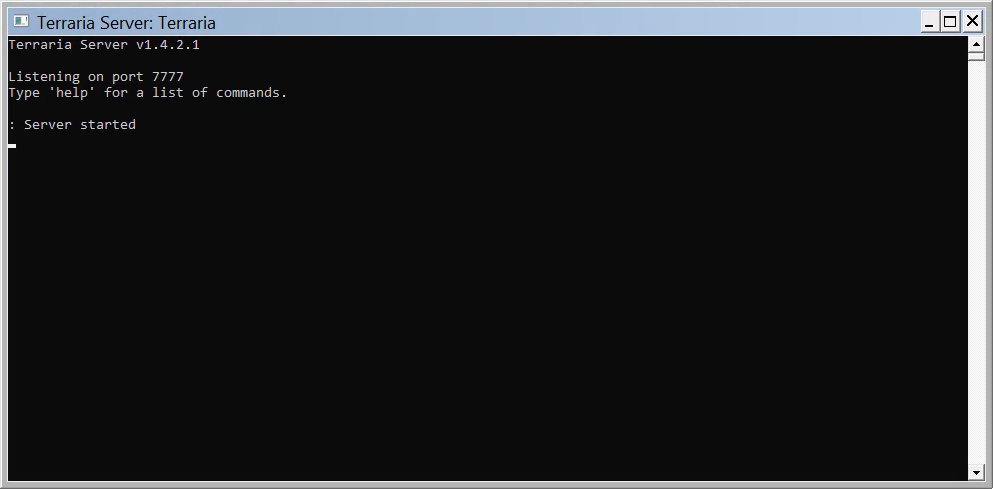
The Terraria game server's status can easily be checked on the main FireDaemon Pro Services List - look for a Running Status value and a numeric Process ID (PID) value. If the service's Interact with Desktop setting is enabled, the game status can also be verified by switching to Windows Session 0 to view the game's messages.